
There's an easier way to add friends and family on the My Disney Experience app now
Planning for a Disney vacation can be overwhelming and sharing plans is a great place to start. Take a step-by-step look at how to do this.
My Disney Experience

The My Disney Experience app and website continue to be the heart of planning Disney vacations both at home and while on vacation. Guests manage reservations as well as tickets and itineraries on the "My Plans" section.
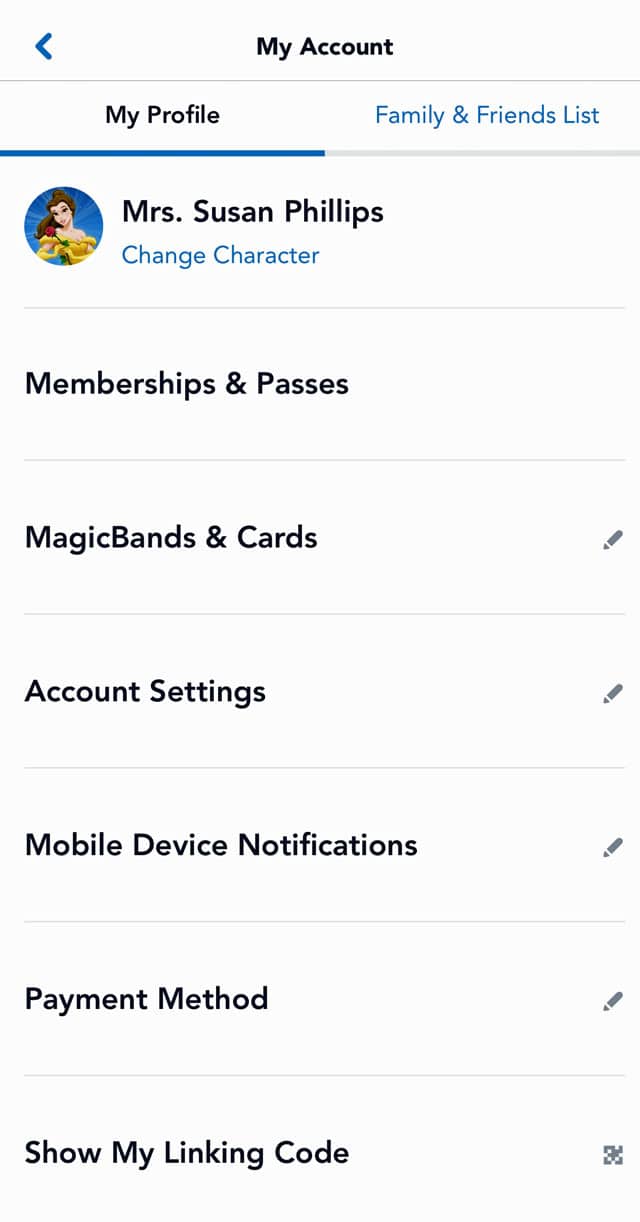
Before you can add anyone, set up a My Disney Experience account for yourself. Start by personalizing your profile with your favorite Disney Character, enter a few details, and you're ready to start planning.
Also, be sure to subscribe to Character Locator for the best Disney planning tool!
Why You Should Connect Everyone
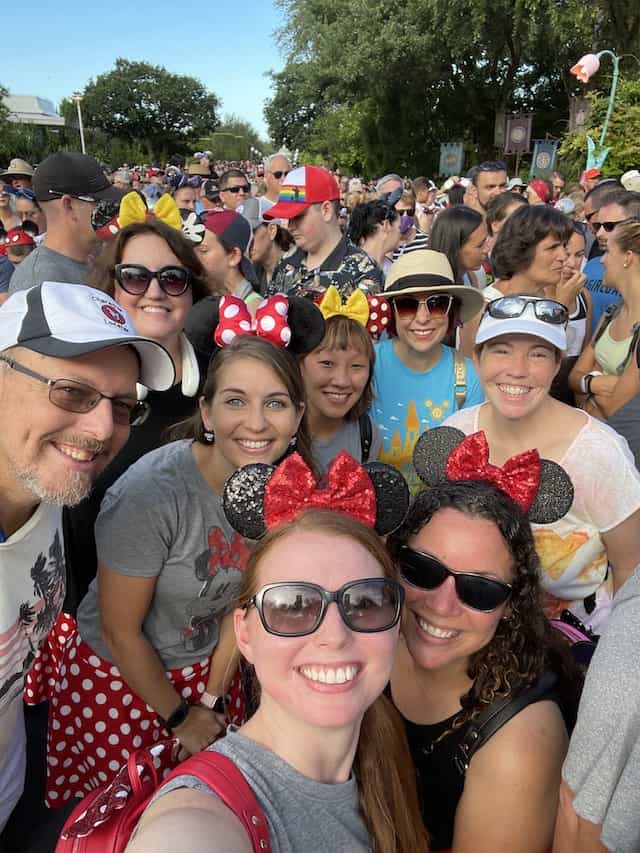
My Disney Experience breaks down the Friends and Family List into those you have plans with and those you don't. Double check your Friends and Family list to make sure everyone is included before it's time to reserve dining and make Genie selections.
Without access to others in your party, you cannot book park reservations together or see dining reservations. In addition, linking everyone also lets you see each other's PhotoPass photos.
Another reason to add your friends and family is Genie and Genie+. You'll need everyone linked for one person to book ride return times for your entire party.
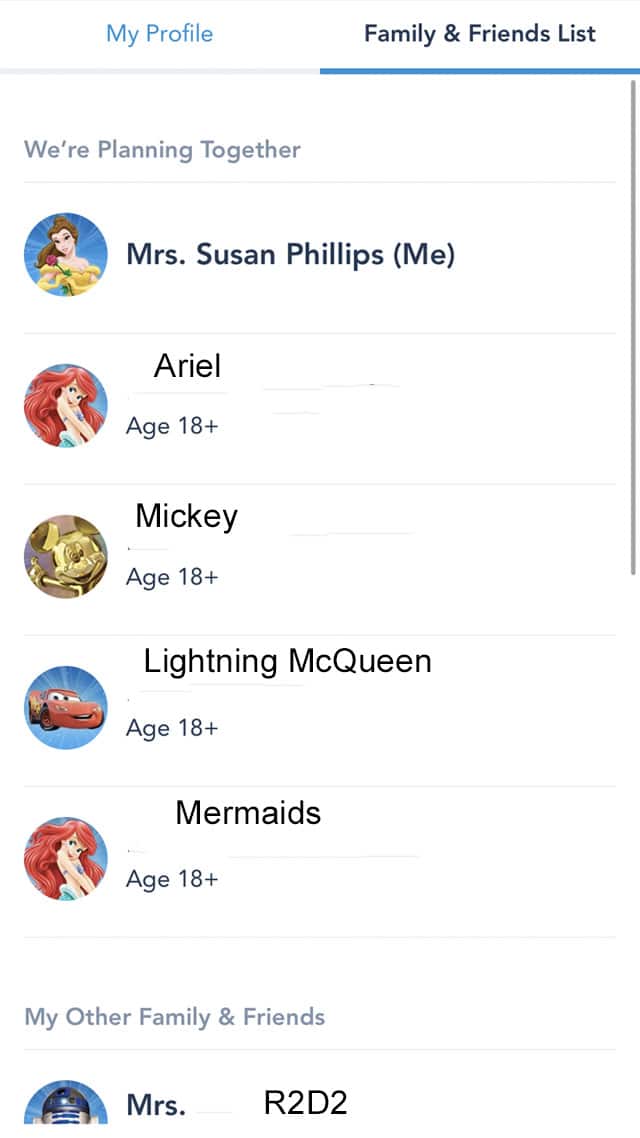
Family members and friends you've previously traveled with should show up under connected guests. Even though you don't have current plans, previously linked people can be found here unless they are removed manually.
Accessing the Main Menu
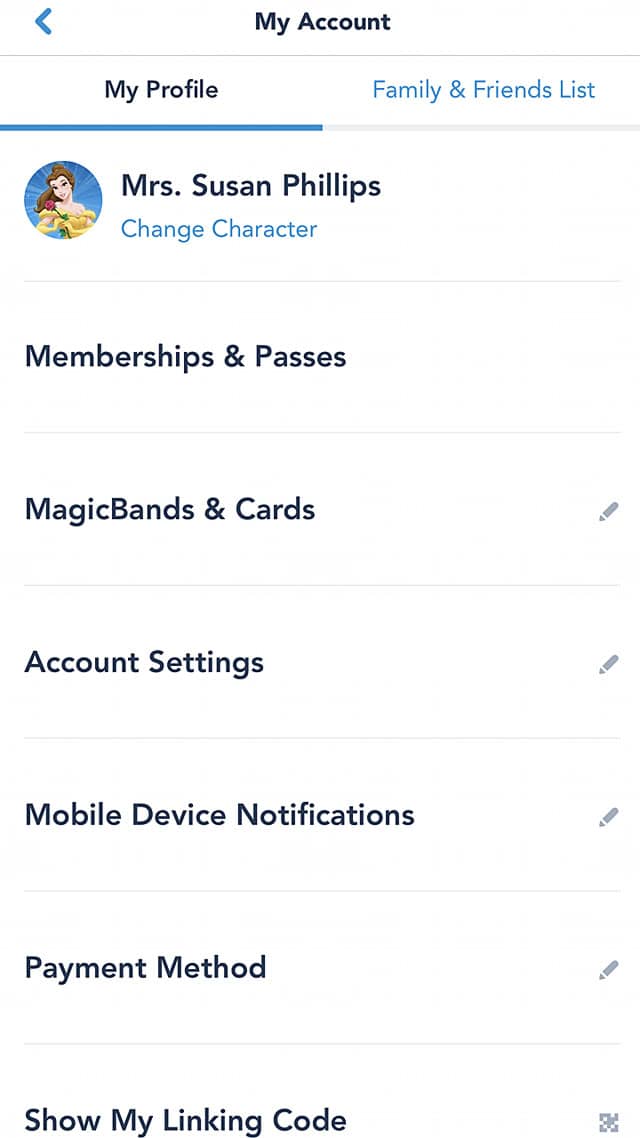
First, open the My Disney Experience app. From the main menu, scroll down and select "My Profile." Next, click on "Friends & Family List" at the top of the screen. From here you can see people that are included on your Friends & Family list and an option to "add guests."
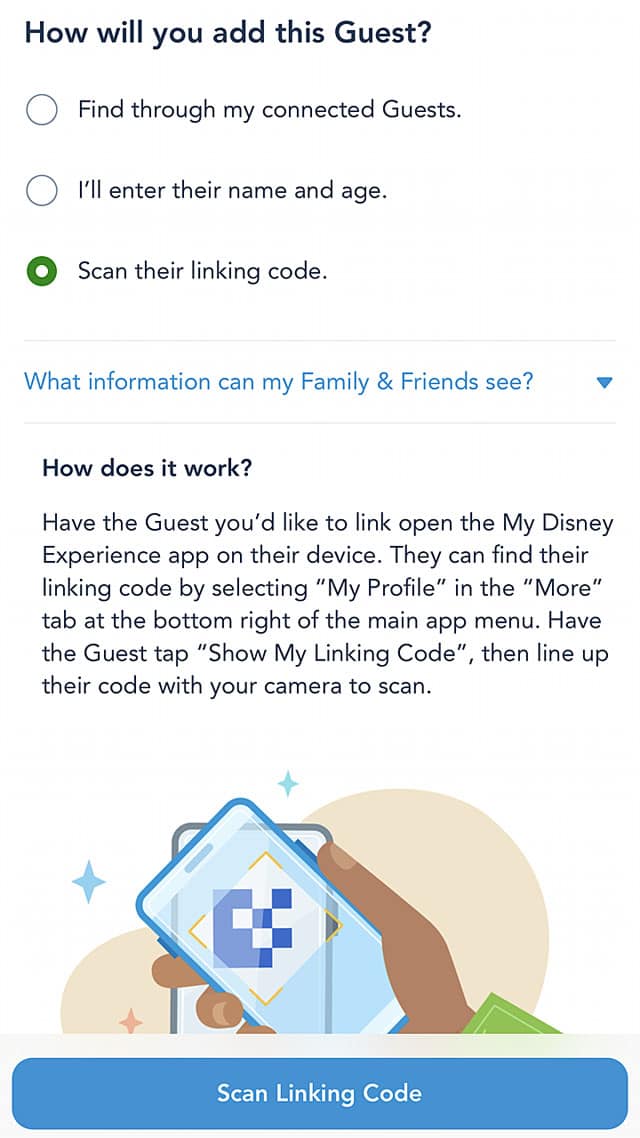
Then, to add someone new, simply select "Add a Guest." This automatically takes you to a new screen. This process is really simple once you get the hang of it. There are three ways to add new people to your Friends & Family List: connected guests, enter people manually, and using a linking code.
Connected Guests
First, find them through my already connected guests. When you select this option, you'll see a list of everyone who is connected to to each of your friends and family.
For example, if I have Sally listed on my friends and family list, I'll see her entire family here that isn't on my list. This is the easiest option but is limited in the people you can connect. When you invite people through your connected guests, they receive an email invitation.
Enter Guest Manually
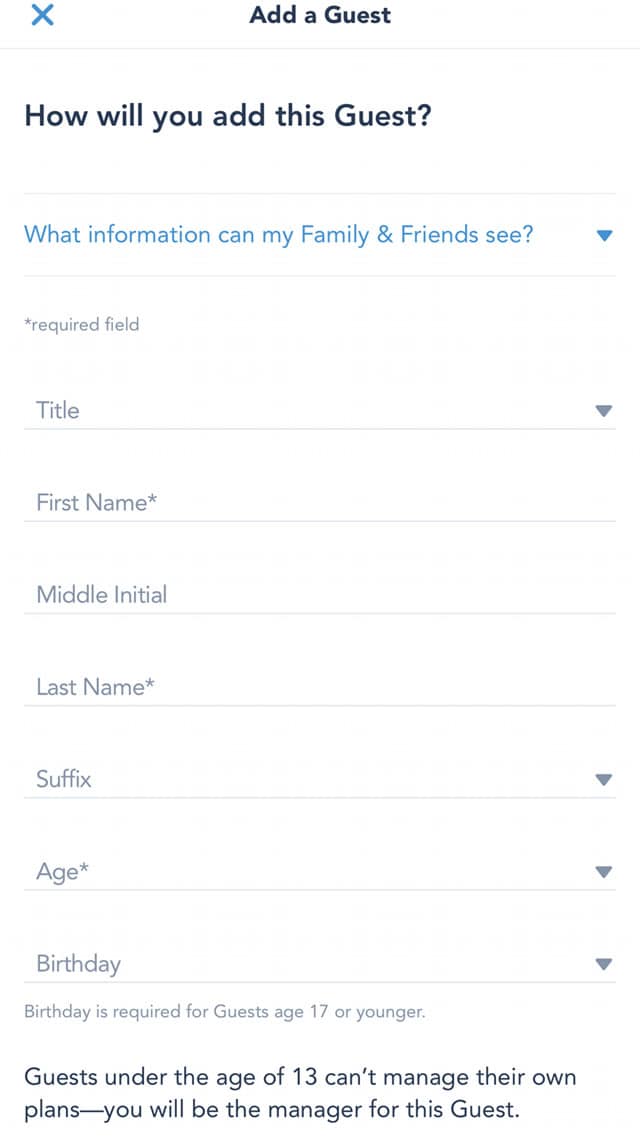
Next, you can manually enter each person's name and age. Keep in mind that this option doesn't like accounts, it just adds someone you're planning for. This option is great for children and others that you don't need their own My Disney Experience app.
You will need to make all plans and link MagicBands for these guests. However, people added by this method will not accept an invitation, they are automatically added.
Linking Code
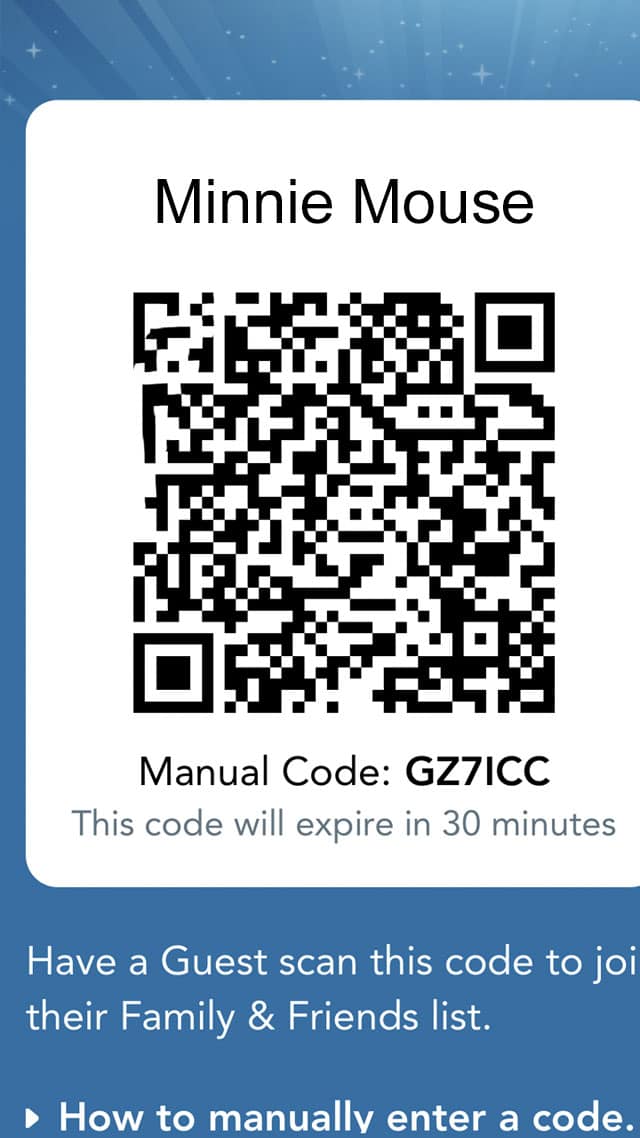
Recently, Disney added an easy way to add friends and families using a QR code. To access it, select "Scan their linking code". Have the person you're wanting to link open the My Disney Experience app on their device.
They can find their linking code by selecting "My Profile" in the "More" tab at the bottom right of the main app menu. Have the guest tap "Show My Linking code". This will generate a unique QR code that your family and friends can scan with their smart device (using their camera) to quickly link your accounts.
You can also manually enter a code to add them join your list. To do this, have the other person select. Then, enter the 6-digit code number of the guest you would like to link. This 6-digit code is shown under the QR code.
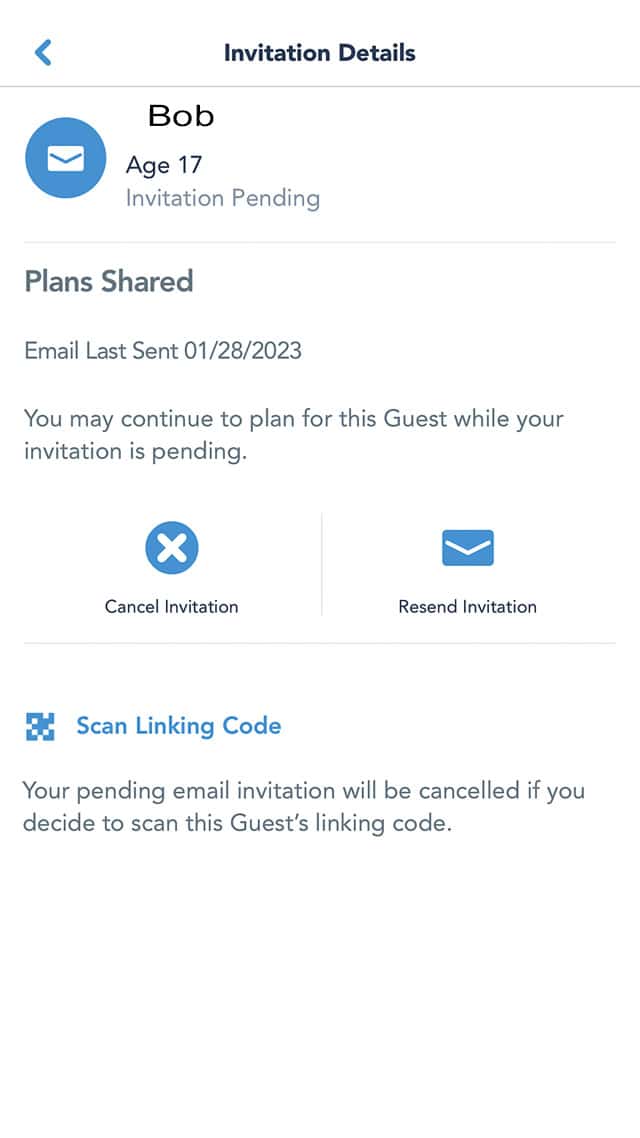
The QR code is created when you send an invitation to add guests to your family & friends list. After sending invitation you'll be able to see details on who you received the invitation and the choice to resend or cancel your invitation. Your QR linking code can also be seen with invitation details.
Pirate tip: Guests under 13 can't manage their own plans so you'll need to manage their plans.
Using Website

To use your browser to add Family & Friends, scroll all the way to the bottom of your list and click on "Add a Guest." From there, you'll see the same options as using the app. Choose the method that works best for you, then walk through the remaining steps to invite them to plan together.
Except for adding guests manually, your friends and family will receive an email invitation they must accept to be connected.
Shared Plans

After linking, plans can be shared between all connected guests. Under the Add a Guest option, you'll see "Want to Share Your List?" This gives you two options: to share your Friends & Family list or keep it private. If you choose to share your list, your family & friends will be able to see:
- Each other's full names
- Ages (or 18+)
- Character images
- Disney PhotoPass photos and other digital content
- Your itinerary items
You can change this setting at any time.
Planning with Linked Guests
Once the person accepts your invitation, the plans you've made for them will be transferred to their Disney account. Then, they can view and co-manage plans you've made together. Shared plans will be shown on your "My Plans" page.
Note: If this guest already made Lightning Lane selections with the Genie service, some of the combined selections may be overwritten.
Hopefully this will make it easier to add friends and family to your MDE. Are you the planning person in your trip, or does someone else do that? Please share your thoughts in the comments below and share this article with your friends and family.